

Felt hats :
The question here about cowboy hats has prompted me to do a little more experimenting : I hope this will be useful to anyone who wants to make their own. Like anything in 1/6th , it ain't perfect , since the fibres are overscale , and the finished result tends to look a little fluffy , but at least you can get the hat you want in something better than moulded plastic.
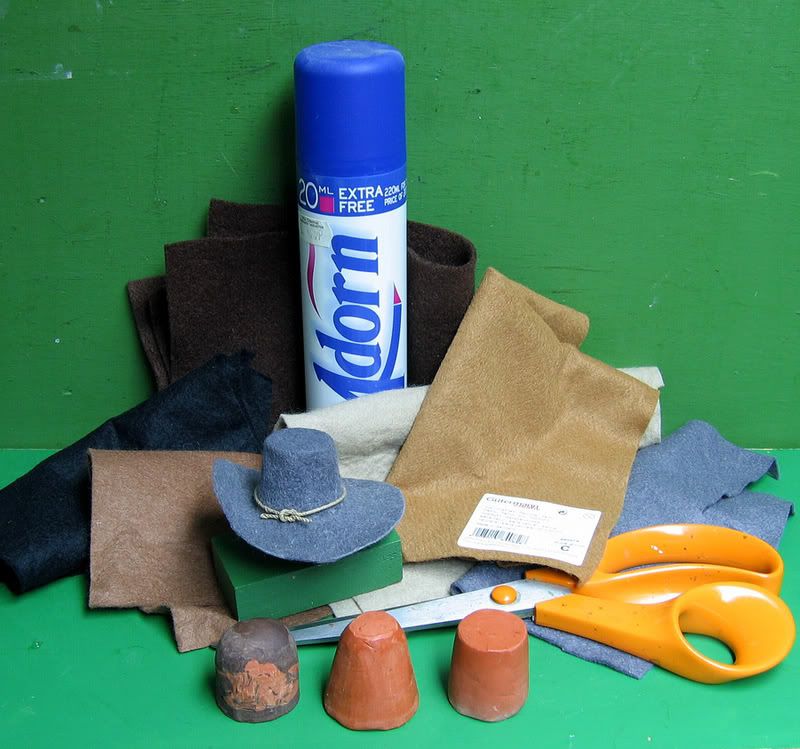
What you need :~
![Image]()
Squares of felt can be bought from any Craft shop , in a variety of useful colours .
I find the polyester felt to be slightly stronger , which helps with the stretching.
This technique follows the 1:1 construction , in that the felt is formed over a block : to make this block you will need some Sculpey , or an epoxy putty like Miliput , Greenstuff or whatever, if you don't have an oven.
The shape of the block is crucial : measure around the head of the figure , and make sure that the block's circumference matches fairly well : a little too tight is better than too big ; the felt will always stretch , but you can't contract it.
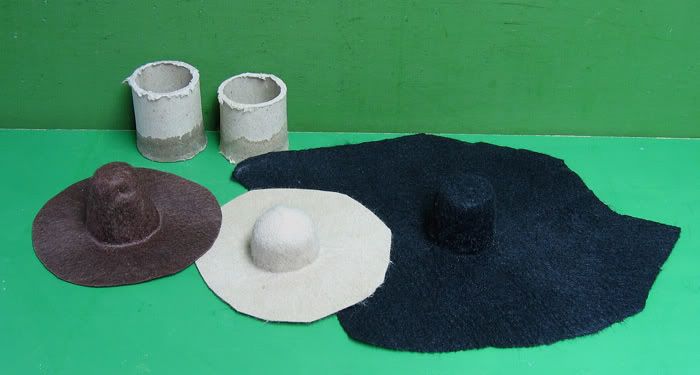
The shape will obviously depend on what you are trying to make…the three blocks in the pic are different shapes for different periods.
![Image]()
You will also need a cylinder of some kind to act as an outer mould to shape the crown over the block : I use bits of cardboard tube , but you can improvise with anything tubular of the right diameter ; it needs to be a snug fit.
Scissors , and maximum hold hairspray , and an iron.
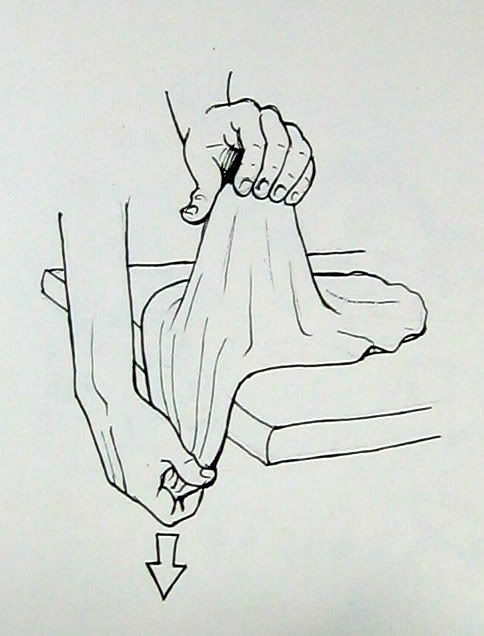
Start by soaking the felt in boiling water ; remove, let cool just enough to be able to handle it and squeeze out the water , and centre it over the block.
Stretch the felt over the block by putting the whole thing on the edge of a really firm ( preferably waterproof ) surface and pulling down the edges hard , to stretch the brim out and get the base of the crown snug against the block : at this stage you might have the bad luck to tear the felt ; tough , but start again with another piece and be more gentle .
![Image]()
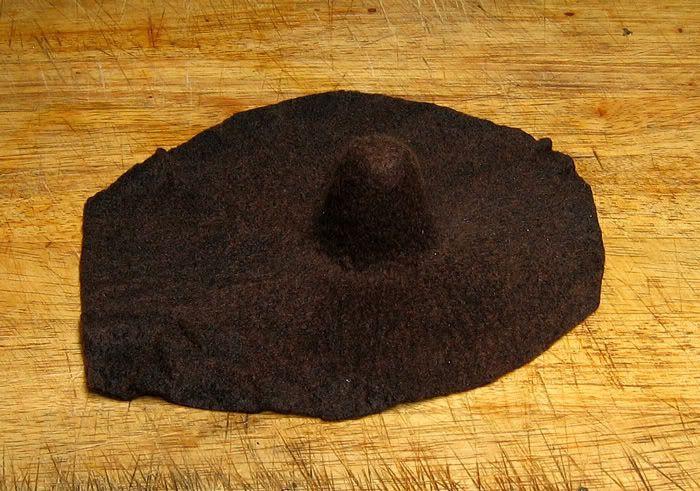
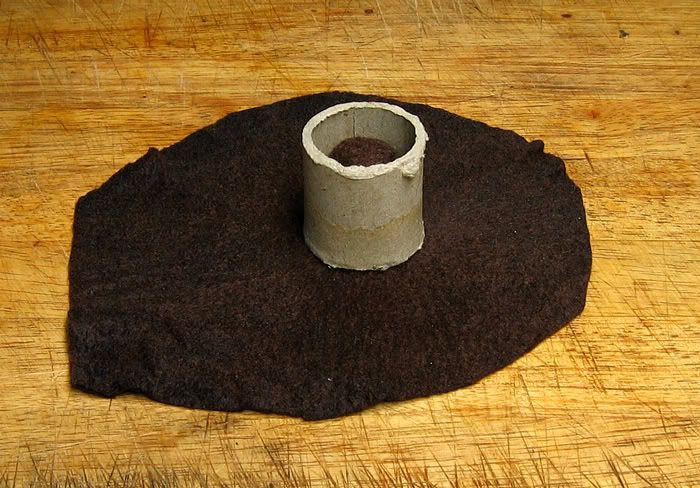
Once you got it succesfully stretched , it should look a bit like this :
![Image]()
Once it's starting to assume the proper shape, apply the outer cylinder :
![Image]()
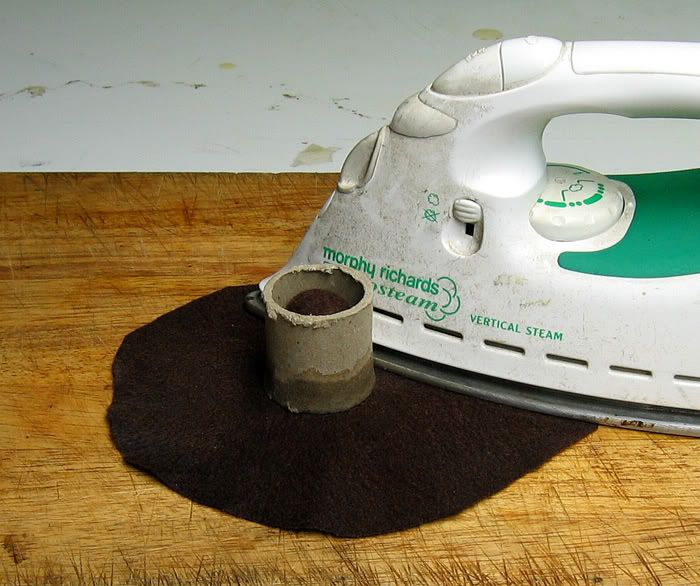
Iron the brim , and let the whole thing dry thoroughly .
![Image]()
Once dry , we try to reduce the slight wrinkliness and fluff by spraying heavily with the hairspray ( Thanks to Royoboy for this tip ) , and ironing with a very hot , dry iron . Mind your fingers.
Put it ouside to get rid of the smell until it's dry !
Your hat is now finished bar the trimming and shaping , adding hatbands etc.
The hairspray does quite a lot to lay down the fluff and stiffen the hat , though they are still a little hairy : real hats are soaked in size , which gives them their stiffness .
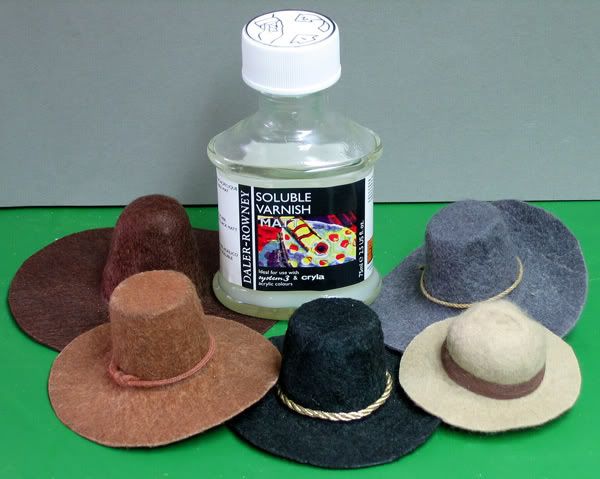
I find it useful with some to use matt varnish as a final treatment to stiffen and de-fluff them : it's up to you .You can also paint with acrylics , well thinned down , if the colour is not quite right , but that will stiffen it considerably.
![Image]()
To shape them once finished , gently stroke and mould in the hand.
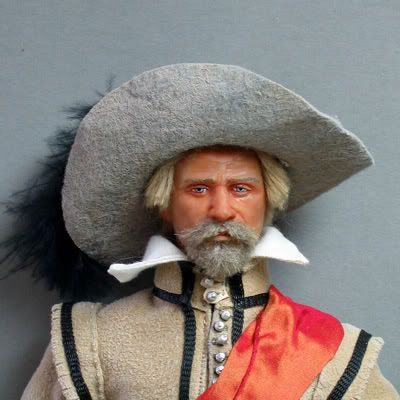
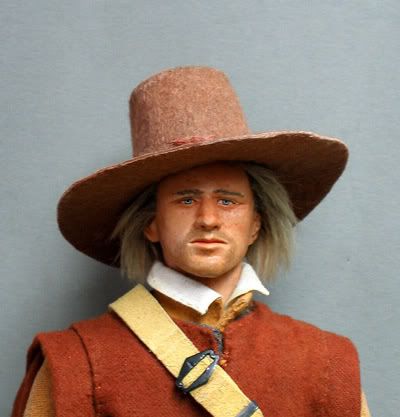
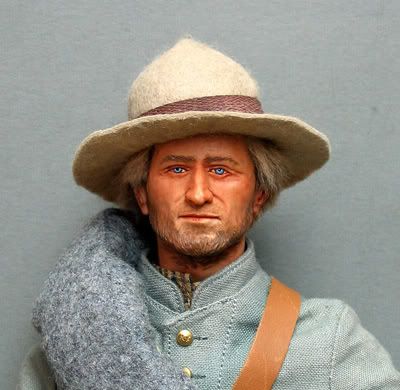
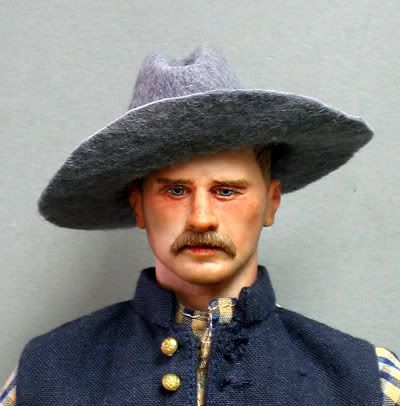
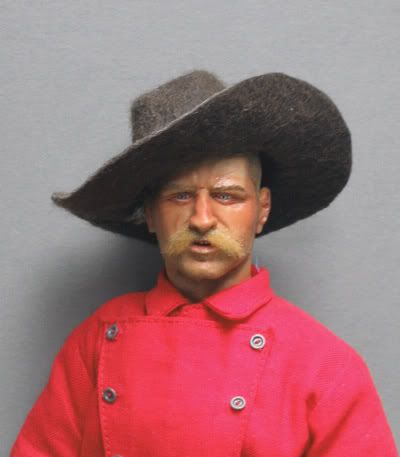
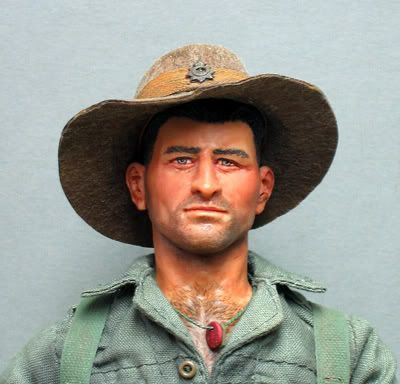
Here are some finished examples:~
![Image]()
![Image]()
![Image]()
![Image]()
![Image]()
![Image]()
Good Luck : this technique does take a little practice and experiment .
*************************************************************
The question here about cowboy hats has prompted me to do a little more experimenting : I hope this will be useful to anyone who wants to make their own. Like anything in 1/6th , it ain't perfect , since the fibres are overscale , and the finished result tends to look a little fluffy , but at least you can get the hat you want in something better than moulded plastic.
What you need :~
Squares of felt can be bought from any Craft shop , in a variety of useful colours .
I find the polyester felt to be slightly stronger , which helps with the stretching.
This technique follows the 1:1 construction , in that the felt is formed over a block : to make this block you will need some Sculpey , or an epoxy putty like Miliput , Greenstuff or whatever, if you don't have an oven.
The shape of the block is crucial : measure around the head of the figure , and make sure that the block's circumference matches fairly well : a little too tight is better than too big ; the felt will always stretch , but you can't contract it.
The shape will obviously depend on what you are trying to make…the three blocks in the pic are different shapes for different periods.
You will also need a cylinder of some kind to act as an outer mould to shape the crown over the block : I use bits of cardboard tube , but you can improvise with anything tubular of the right diameter ; it needs to be a snug fit.
Scissors , and maximum hold hairspray , and an iron.
Start by soaking the felt in boiling water ; remove, let cool just enough to be able to handle it and squeeze out the water , and centre it over the block.
Stretch the felt over the block by putting the whole thing on the edge of a really firm ( preferably waterproof ) surface and pulling down the edges hard , to stretch the brim out and get the base of the crown snug against the block : at this stage you might have the bad luck to tear the felt ; tough , but start again with another piece and be more gentle .
Once you got it succesfully stretched , it should look a bit like this :
Once it's starting to assume the proper shape, apply the outer cylinder :
Iron the brim , and let the whole thing dry thoroughly .
Once dry , we try to reduce the slight wrinkliness and fluff by spraying heavily with the hairspray ( Thanks to Royoboy for this tip ) , and ironing with a very hot , dry iron . Mind your fingers.
Put it ouside to get rid of the smell until it's dry !
Your hat is now finished bar the trimming and shaping , adding hatbands etc.
The hairspray does quite a lot to lay down the fluff and stiffen the hat , though they are still a little hairy : real hats are soaked in size , which gives them their stiffness .
I find it useful with some to use matt varnish as a final treatment to stiffen and de-fluff them : it's up to you .You can also paint with acrylics , well thinned down , if the colour is not quite right , but that will stiffen it considerably.
To shape them once finished , gently stroke and mould in the hand.
Here are some finished examples:~
Good Luck : this technique does take a little practice and experiment .
*************************************************************
")


